|
Seeing as fall is my alltime favorite season, I am a fan of pumpkin EVERYTHING. and I mean EVERYTHING! and this pumpkin bread is no exception! 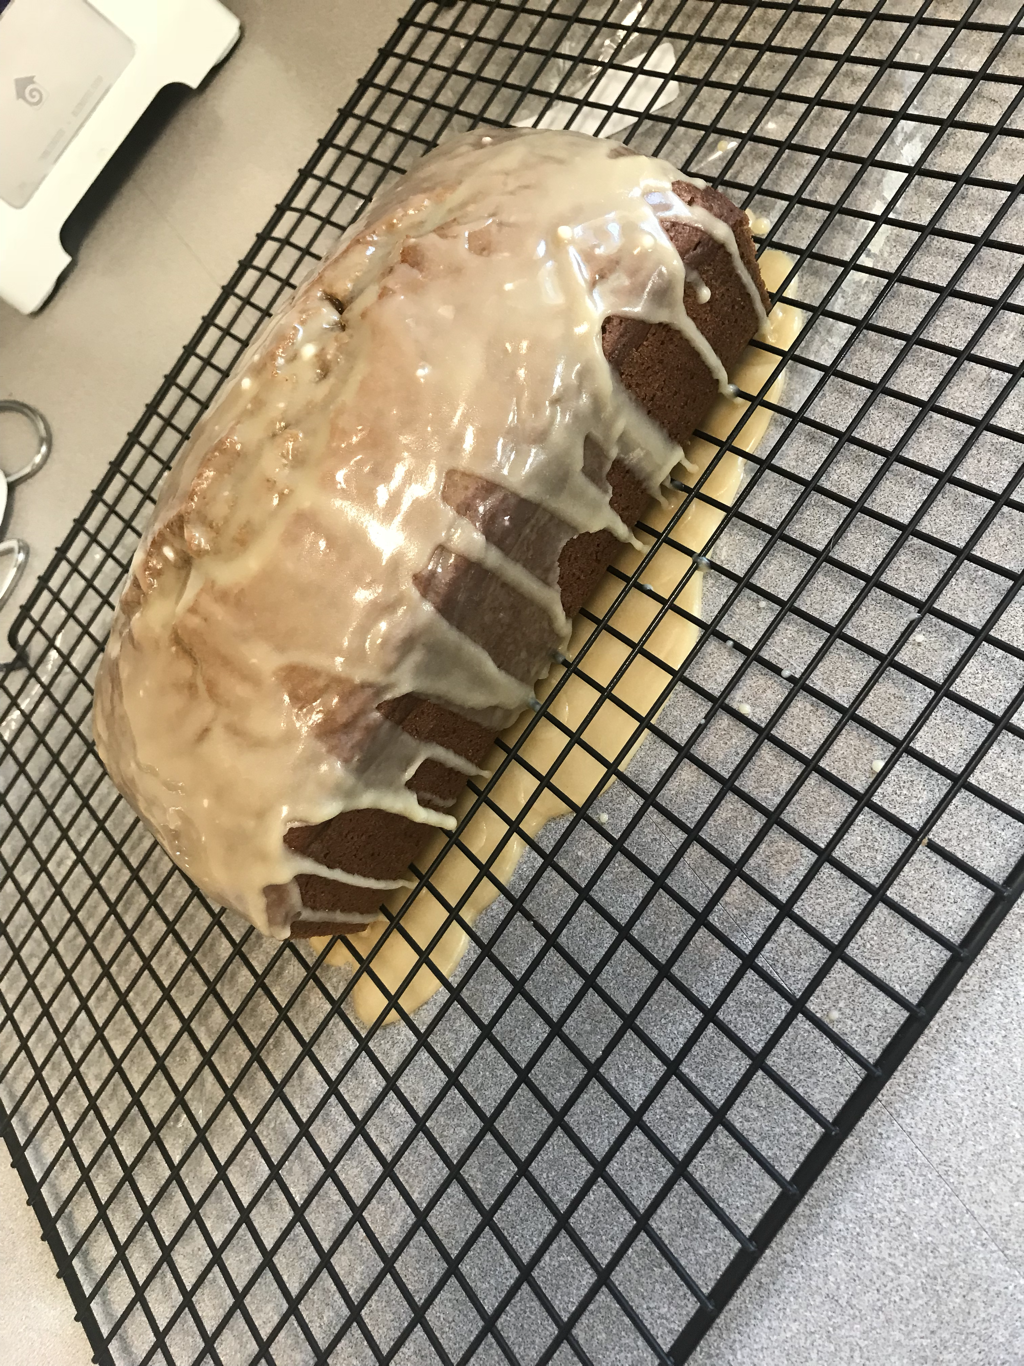 I made this yesterday after the hubby and I spent our morning at the pumpkin patch. We were in love! I had to share the recipe with three Facebook friends, and decided to add it here as well! What you’ll need: Bread: •one 9x5 inch loaf pan, (although you can easily double or triple this recipe) •1 1/2cup all-purpose flour •1 teaspoon baking soda •1/4 teaspoon baking powder •1 teaspoon salt •1 1/2 teaspoons ground cinnamon •1 teaspoon ground ginger •1/2 teaspoon ground nutmeg •1/4 teaspoon ground cloves •1/3 cup milk •1/2 teaspoon vanilla extract •6 tablespoons (3/4 stick) butter, softened •1 cup sugar •1/3 cup packed brown sugar •2 large eggs •1 cup cooked or canned pumpkin purée (NOT pumpkin pie filling!) (add if you wish) •1/2 cup coarsely chopped walnuts or pecans •1/3 cup raisins or chopped dates Frosting: •1/2 cup butter •1 cup lightly packed brown sugar •1/4 cup heavy cream (or other milk) •2 cups powder sugar What you’ll do: 1. preheat oven to 350 degrees 2. grease your 9x5 inch loaf pan 3. in a medium bowl, whisk together flour, baking soda, baking powder, salt, cinnamon, ginger, nutmeg, and cloves. 4. combine in a small bowl, milk and vanilla extract. 5. beat in a large bowl until fluffy, butter, sugar and brown sugar. Beat in egg one at a time. Add pumpkin and beat on low speed. 6. Add the flour mixture in 3 parts, alternating with the milk mixture. Beat on low speed or stir with rubber spatula until smooth (scraping sides of bowl as necessary). 7. If you opt in for nuts or rasins, fold in. 8. Pour into greased pan and spread evenly. Bake on center rack of oven until toothpick inserted comes out clean, roughly 55 minutes! Remove from oven and let cool 5 minutes before removing from pan to finish cooking. 9. For frosting, melt butter in a medium sauce pan and boil for 2 minutes. Stir in brown sugar, reduce heat to medium, and boil for another two minutes, continually stirring. Stir in milk, remove from heat and pour into large bowl. Stir in powdered sugar. Frost cooled bread. You’ll have to do a few layers of icing, as it is pretty thin, but the left over icing is perfect to spread over slices after you’ve cut into your loaf. YUM! Enjoy! -Mischeif Managed
0 Comments
Sooo, new news to this very old (and much unloved blog of mine...) we are expecting our first little girl! 💗 We moved across the country (AL to CA) while I was 6 months pregnant, so the majority of early pregnancy was spent packing and planning our move. Once we got settled in, I was finally able to start on the nursery for our little girl! And yes.. low key.. her middle name is after Lily Potter. Although, my middle name is also a flower (rose) so it works both ways 😉 anyways.... here is her bedroom! There are still a few details to add.. and im sure I’ll update as I get more creative with her decor! 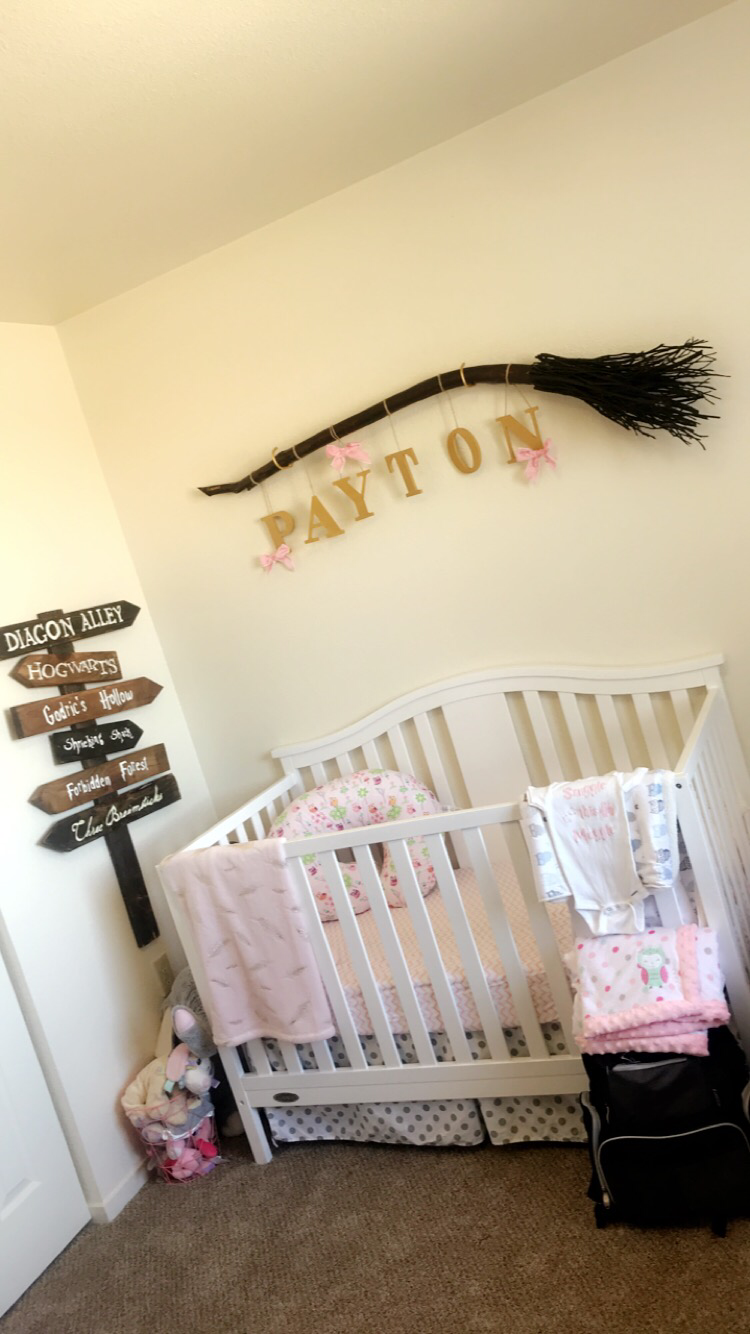 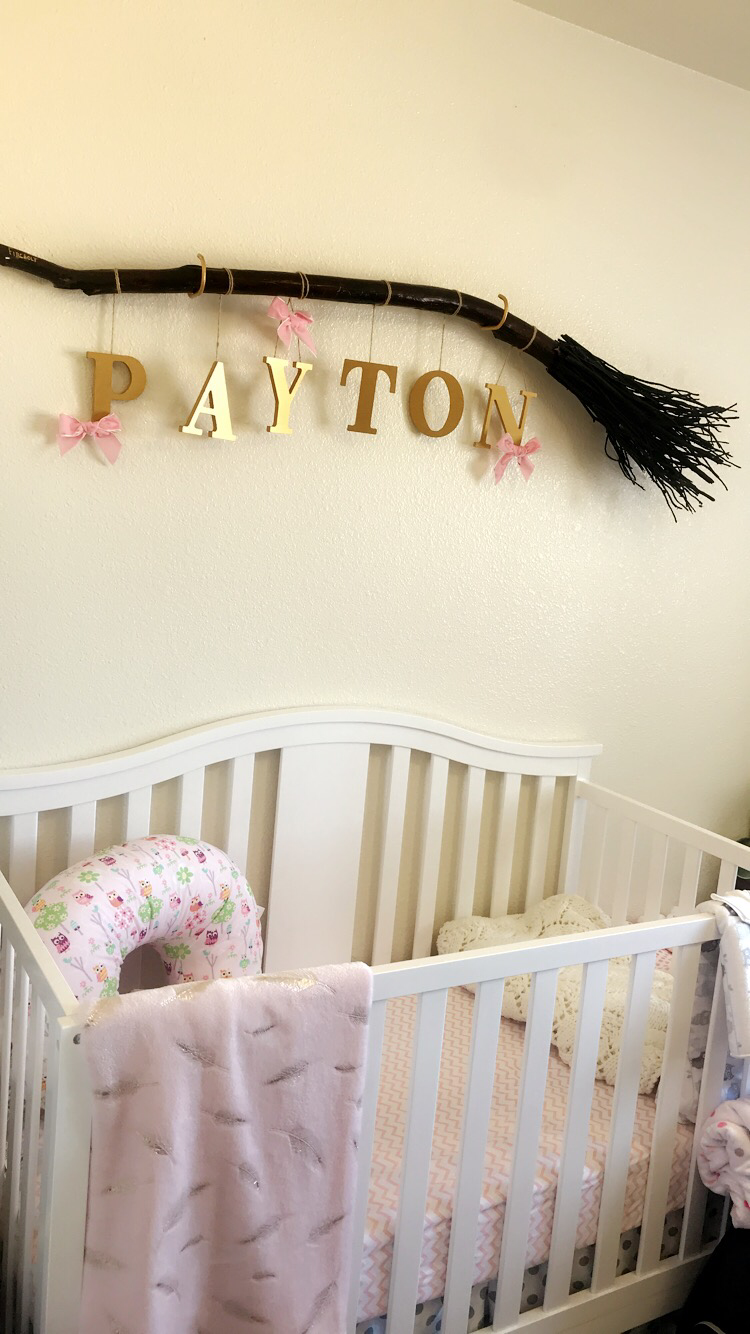 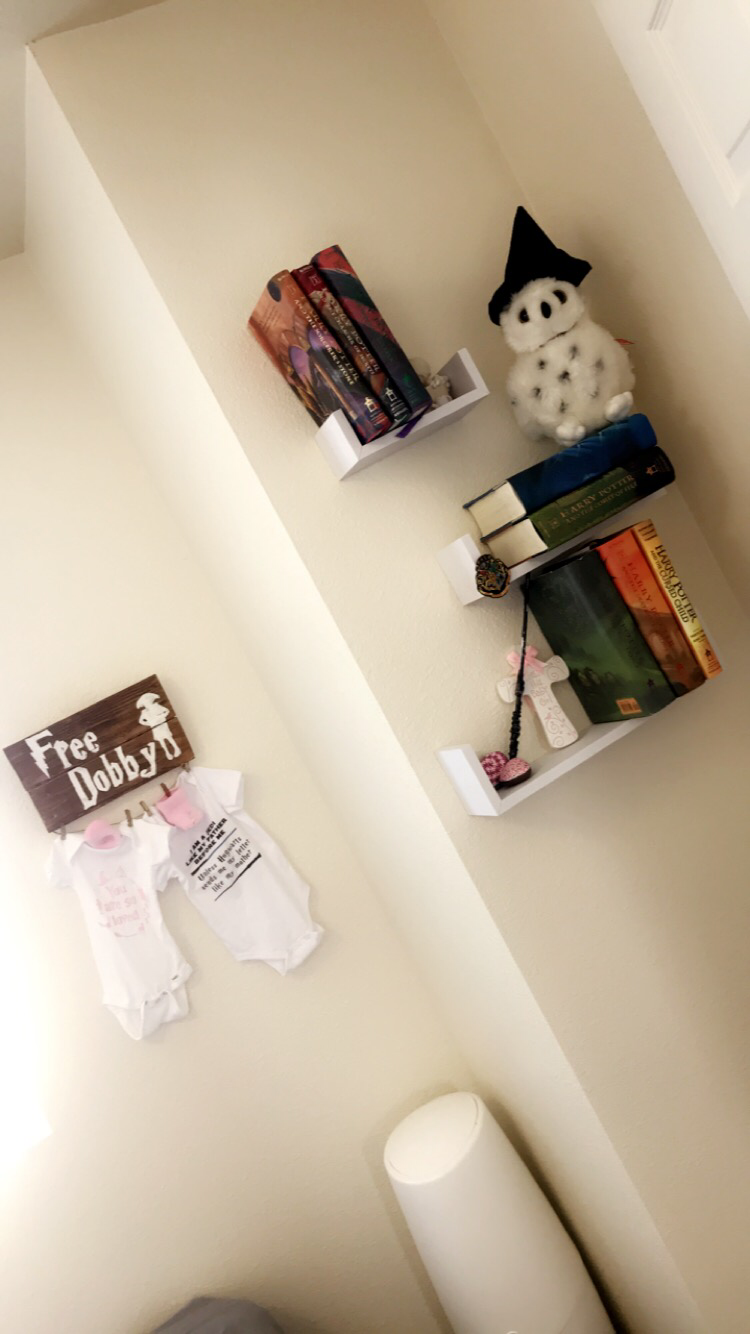 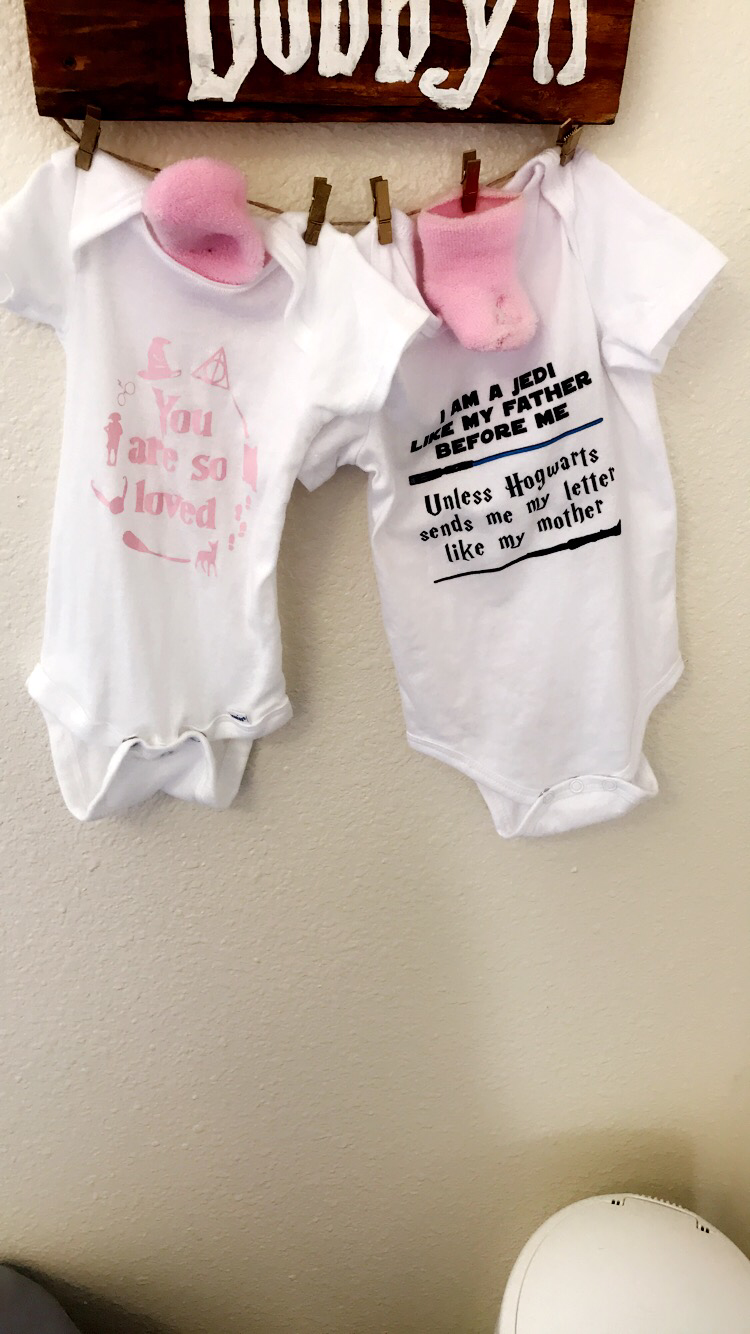 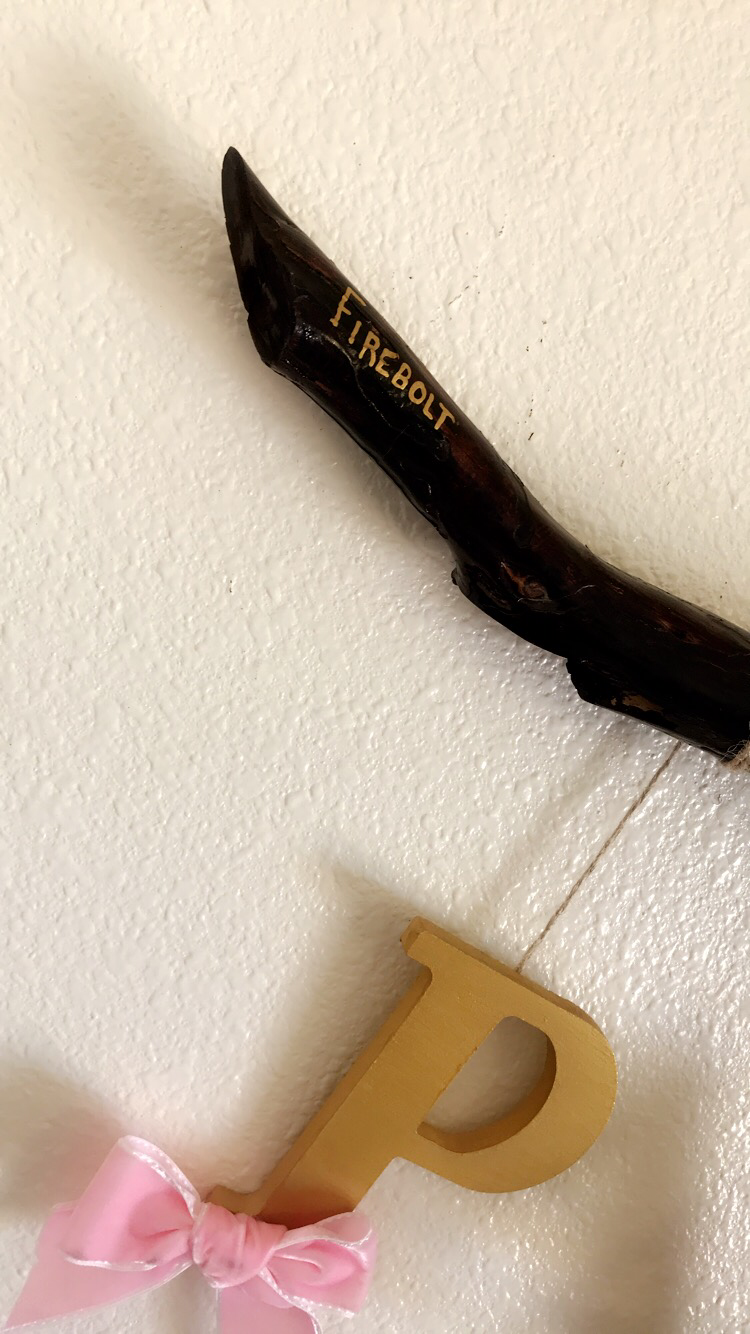 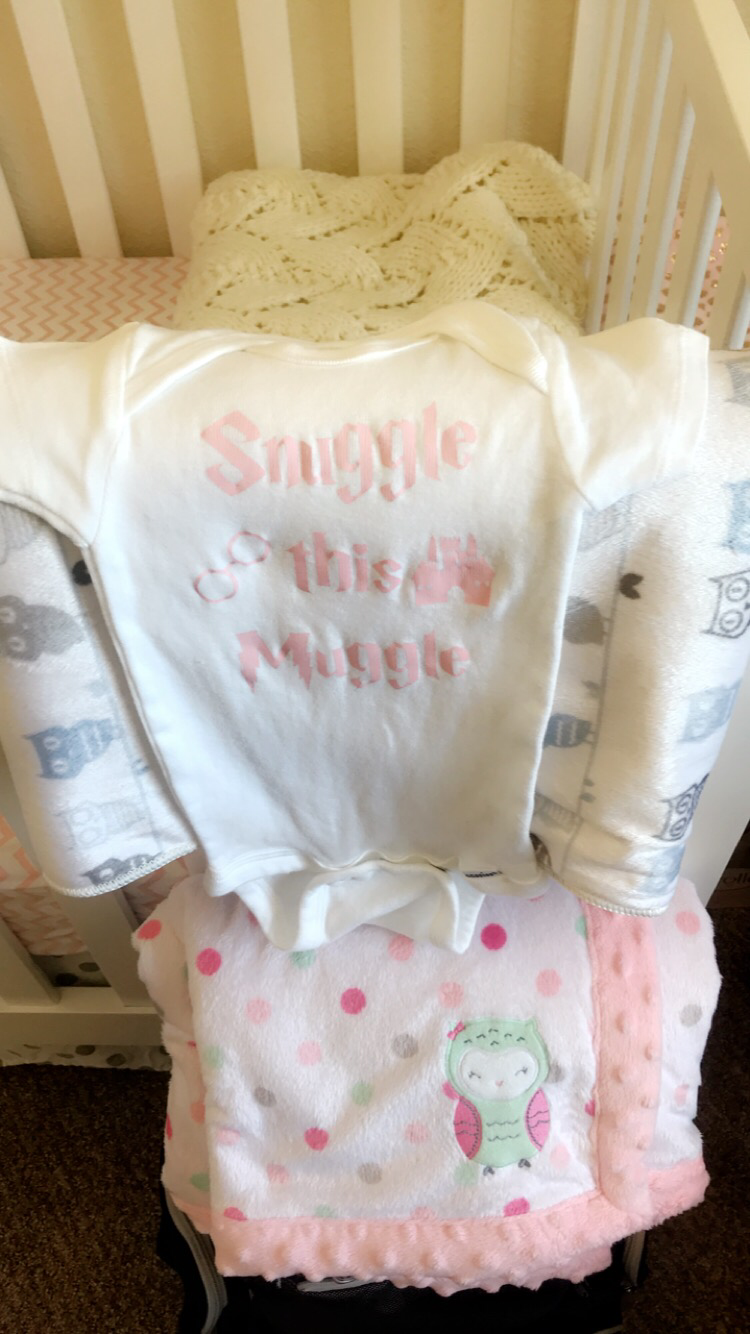  the room also had some heart felt and important touches to it too, such as the blanket inside of the crib (cream colored) that was made by my great grandma more than 10 years ago, before she passed away! My grandma (it was her mom who made it, and passed) actually saved it for me that whole time, just so she could give it to me when we had our first baby! So special! there are also some sweet and sentimental painted rocks on the shelf with her books that a close friend of ours gave to us with our baby gives before we moved away from AL! also keep in mind that the decor I made myself! The directional sign, the “free dobby”, as well as the broomstick! They were all really easy, so if you like anything and have questions on how to make (before I create blog posts for how I did them) feel free to comment! And check out those adorable onesies! Cmon! Anyways.. I hope this gives you Pinterest-ers some ideas for your Harry Potter nursery’s.. and if you have any ideas on what else to make or do for our own.. don’t hesitate to comment below! Thank yall so much! -Mischeif Managed. I absoloutely LOVE Christmas decorating. Sadly, I am all about that premature Christmas decorating around the house (don't worry, I wait to decorate the outside until thanksgiving)! But to me, inside is fair game. I needed a new door wreath, and came across a few cute ideas for a Rudolph wreath, and decided to give it a shot! Enjoy! so this was a fairly cheap wreath. I think I got all my supplies for around $35-40 from Michaels (with a 20% off coupon!) for this wreath you'll need wire door wreath (whatever size works for you) 2-3 rolls of burlap (I had 2light rolls and 1 dark roll) 4 picks of sorts to use as anters (mine were tree branch picks.. if they have antlers, even better!) bow, or ribbon to make bow large ornament or bell to use for nose (mine is a bell) pipe cleaners hot glue the fun part about a wreath like this, is it's so interchangeable so you can customize it however you'd like! 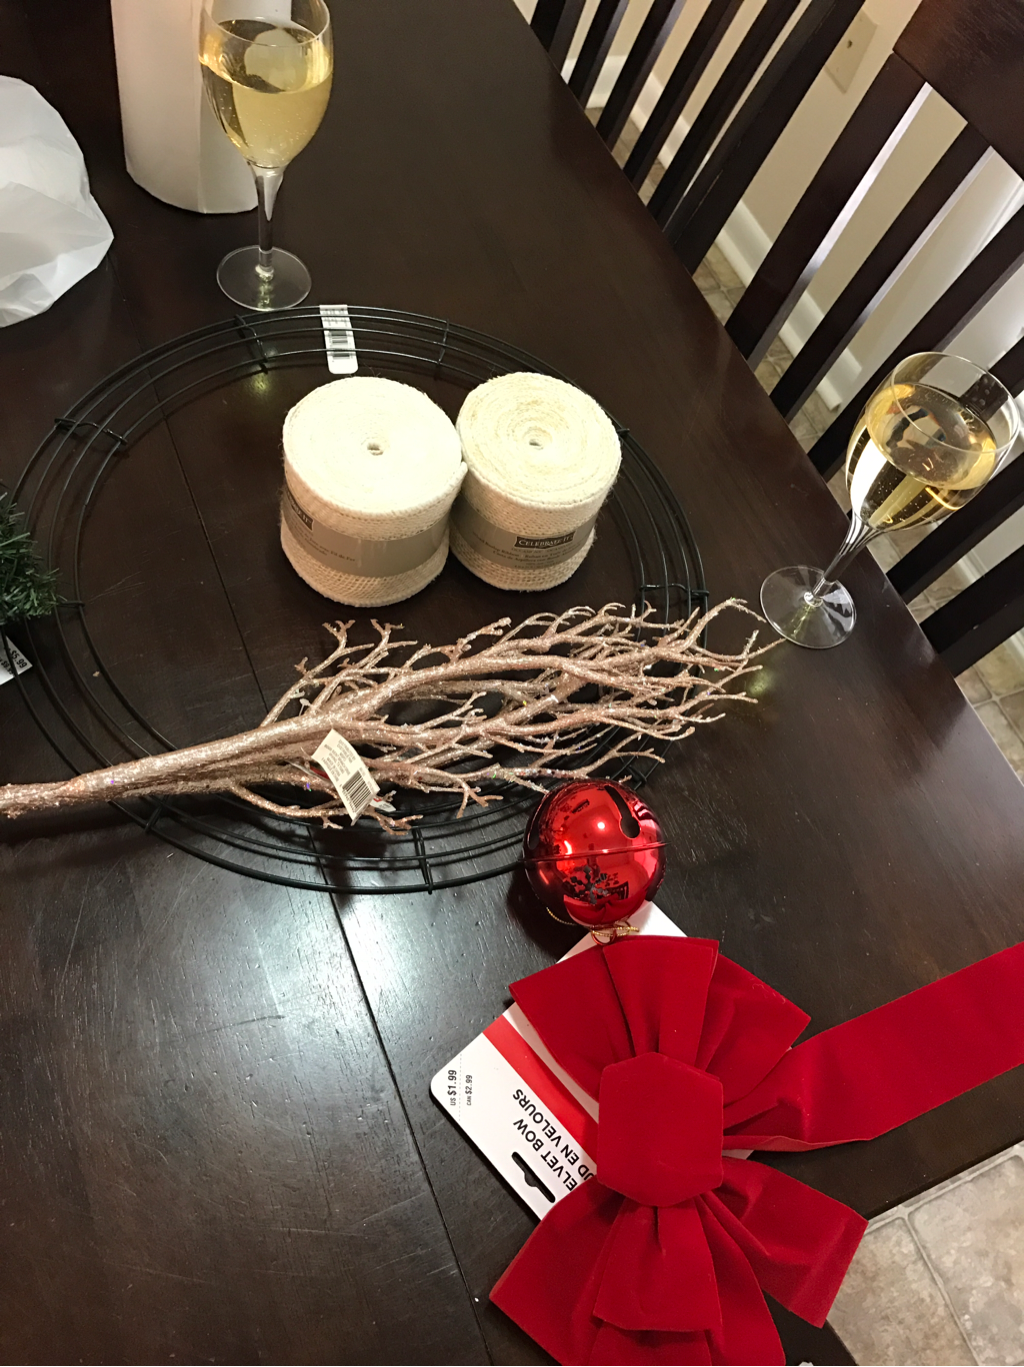 start making your wreath by weaving the burlap through the wires. Since I used two colors I did two of the light, one of the dark, and braided them together of sorts when I was weaving them into the wire. 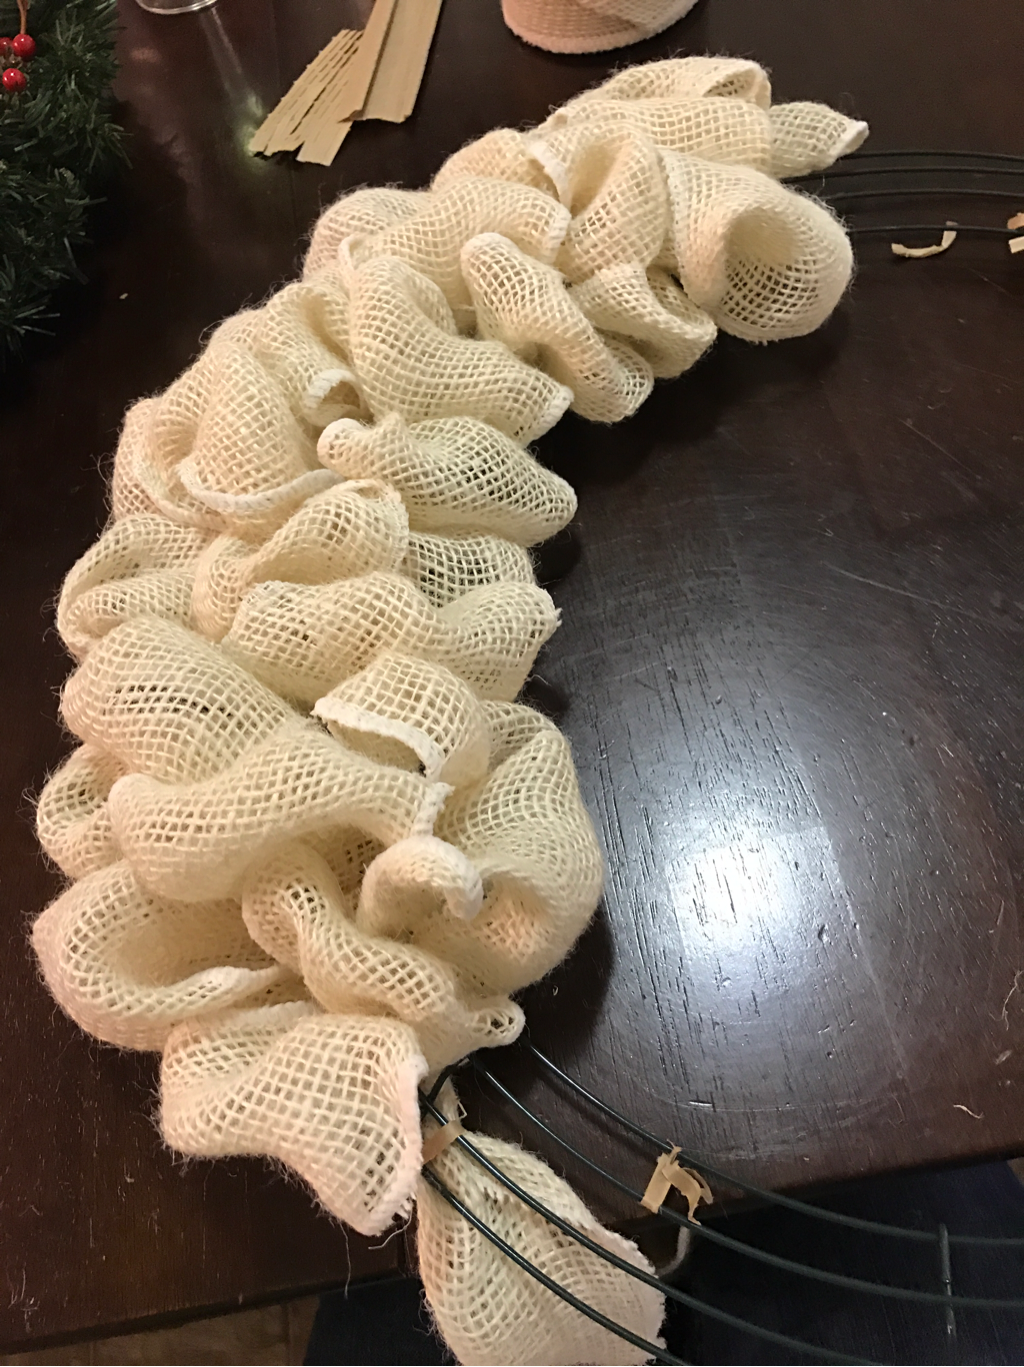 (In the picture above was before I had decided to use two colors) after you finish all the burlap, time to attach your nose and anters! I had tied them on with my pipe cleaner, and then hot glued them to ensure that they stayed in place. be sure you give everything time to dry or you'll have to continue to glue, as it may all fall apart continuously like mine did 🙃 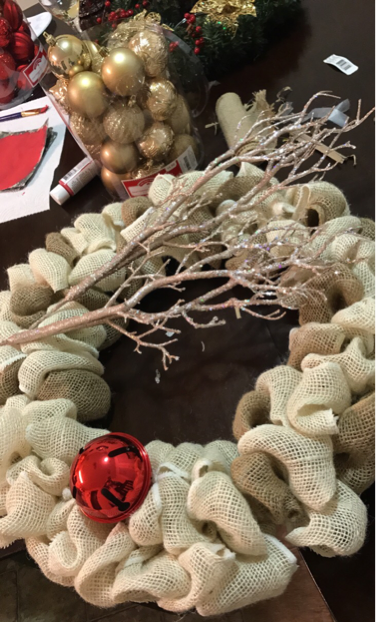 dont forget, the fun part about projects such as this, is to make it your own! To get a little creative. ENJOY!  -Mischeif Managed-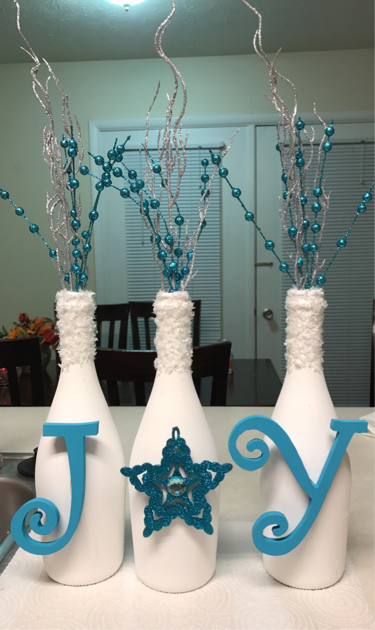 If there is anything I love in this world (aside from that sweet hubby of mine) it is a good glass of wine, and DIY crafting! Lately life has been so hectic that I haven't really given myself a good evening to relax and just craft. So last night a good friend of mine and myself decided it was time to combine our two favorite things, and have ourselves a sweet little craft night. I have wanted to, for quite some time, make some sort of holiday decor out of my empty wine bottles I've saved. (And it seems I have quite a lot of bottles I've saved) I searched through Pinterest for a few hours and finally got a rough idea of what I was going to make. 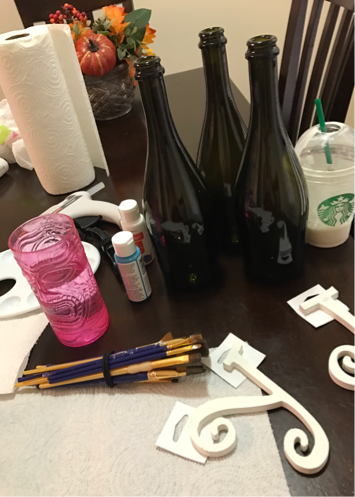 If interested you'll need: •3 empty, clean wine bottles (any size will do, mine came from a Moscato D'asti) •1 tube white acrylic paint •1 tube blue acrylic paint (I used turquoise, but you can always change for the color of your choice) •J and Y letters •1 snowflake of sorts for your "O". •6 or so decorative picks for top of bottle (depending on how full you like) •faux snow •modge podge •Paint brushes •hot glue gun (Side note: with the excepting of the bottles, glue, and brushes, my supplies were only $14 at Michaels, and they always have coupons!) then comes painting! At first I thought that using some sort of sponge would work better than a brush (I'm not a very good painter.. don't laugh), so if/when you make them, it wouldn't hurt to give the sponge a try! Who knows, it might turn out looking even better. So when I painted, I did a total of two layers of blue on my J and Y letters, front and back! And three layers of white on the wine bottles, as they were such a dark color. 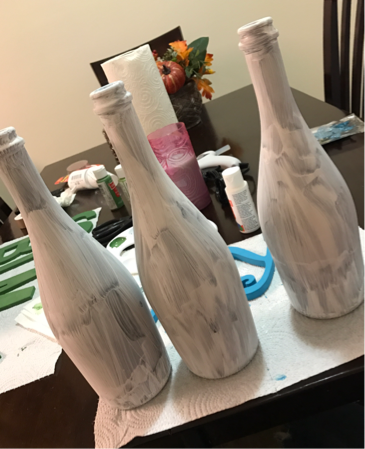 Bottles after 1 coat of white. (You can see the little Y with its first coat of blue!) make sure before you attempt to put your letters or snow on your bottles that you let it fully dry.. it will save you several attempts at re-painting and washing paint off your fingers! next step is putting your snow on. I took a small brush and brushed on the modge podge over the top 3 or so inches of the bottle, and sprinkled my snow very generously. I did this over the trash, so it was less of a clean up I would have to do later. Then comes applying the letters! As wine bottles are oddly shaped and the letters aren't meant to wrap around to fit perfectly, there's only one spot on each letter (and snowflake) that can apply to the bottle. I put a generous amount of hot glue on each of those spots and held it on the bottle until it was dried completely. last comes putting in your decorative picks, and finding a shelf in the house! The fun party about this project is there are so many ways to mix it up. Changing the colors, changing the letters (maybe do Noel next time??).. because really.. who is ever going to run out of empty wine bottles? 😉 enjoy! 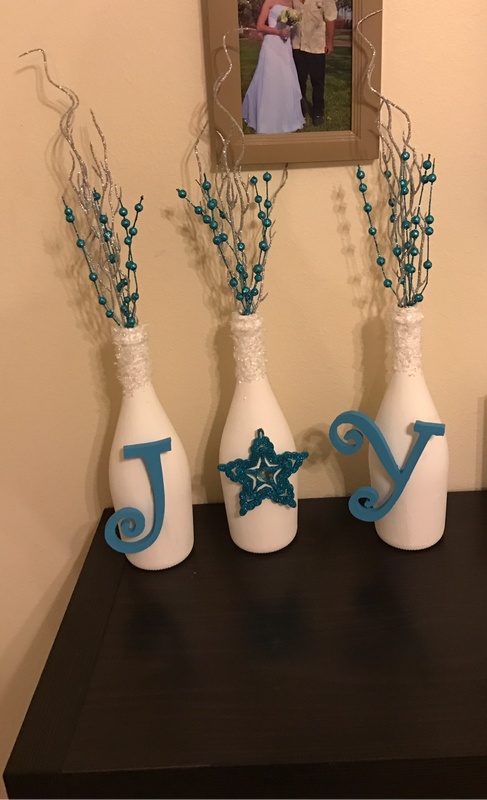 -Mischeif Managed- |
Author
just a sassy muggle wife, loving life and blogging along the way. ArchivesCategories |
 RSS Feed
